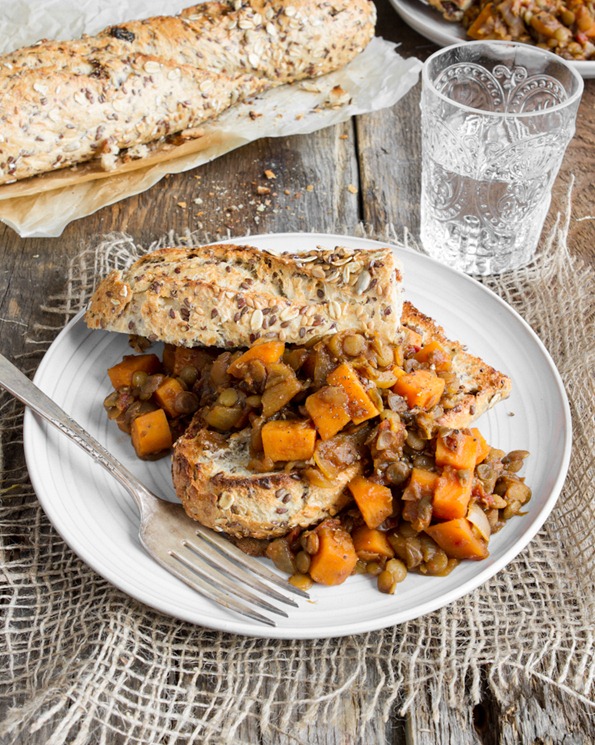
Ukie Baba Jr eating the fruits of her labor. Well no fruits were involved here...this was old school fatty holiday food. So rewarding and DELICIOUS when sticking to a pretty healthy diet.
Ukie dessert.
Ok that is totally not true I got this gelato from Fresh Direct that was AMAZING, topped it with strawberries, Nutella and gluten free breakoff cookies. YUMMERS.
Hope everyone had a Happy Easter!
Love from Jersey and even more love from the Easter Bunny:
This is Rupert. He is our new puppy and he is amazing. His "tail" is coming to a blog hear you. ;)
Wow. That looks just fabulous on this cold January afternoon in NYC...and speaking of January
I love what she writes about dieting and "resolutions" this month:
Oh, January. Your detoxes, cleanses, juice fasts, diet commercials, and
cellulite cream jeans are starting to get on my nerves. Just so you know
I’m tuning you out, so don’t bother trying to lure me in with 6 easy
payments or strict diet plans. It’s just not my thing. My approach to
January – or any other month for that matter – is to eat food that makes
me feel good and less of what doesn’t.
Love it. So simple. A healthy non-extreme approach to our relationship with food! What a concept!
Of course all I ever think of when I hear that word is that hit tune from Fiddler on the Roof. Once a musical theater nerd, always a musical theater nerd. Funny enough it's a perfect tie in, as this post touches upon Russian, Ukrainian, and Polish Christmas traditions. This year I wanted to to a full 12 course traditional Ukrainian meal, but with my travels it was impossible to do as I got home on Christmas Eve...eve. But I am already looking forward to next year when I can continue my Baba's legacy in the kitchen.
Get easy access to basic recipes and read a little more about Sviaty Vechir here. I love the part about how the meal commences when the children find the first star to light the sky on Christmas Eve. What a great tradition! I also love the idea of leaving a chair empty for those who have passed on.
Since I didn't have the time to prepare a feast, I will focus on the other very important aspect of any Slavic holiday...drinks!
More specifically, Honey and Cherry Vodka.
My cousin has my Baba's secret recipe for her honey vodka, and I have yet to wrestle him for it, so I found this one online. ;)
Prep Time: 20 minutes
Total Time: 20 minutes
Makes about 1 quart
Ingredients:
2 tablespoons cold water
2 cups sugar
4 cups boiling water
1/4 vanilla bean, split
1/4 teaspoon nutmeg
2 whole cloves
1 small cinnamon stick, cracked in half
10 black peppercorns
20 allspice berries
1 1/3 cups honey
Zest from 1 orange
2 cups vodka
Preparation:
In
a large saucepan, combine cold water and sugar and heat until it
dissolves. Add boiling water, vanilla bean, nutmeg, cloves, cinnamon
stick, peppercorns and allspice. Bring to a boil, cover, reduce heat and
simmer 5 minutes.
Strain the simple syrup you've just created through cheesecloth
or a coffee filter and return to the saucepan. Add the honey and zest, and heat, stirring, until the honey has completely dissolved. Bring to a boil and immediately remove from heat.
Gradually stir in vodka. Serve hot. If serving, cold, let
honeyed vodka come to room temperature, transfer to a lidded jar and
refrigerate, covered, until ready to serve.
Honeyed vodka or Medivka,
served hot or cold, is a favorite among Ukrainians and Poles. And, since it's steeped
in aromatic spices, less than top-shelf vodka will do just fine. No matter what temperature it's served at,
warms the body from the inside out. Perfect for the holidays!
Two cousins made two different marinated sour cherry vodkas,
and we had a taste test to see which was the best. They were both quite different, but the basic recipe goes like this:
SOUR CHERRY VODKA

 Recipe By     : Homemade in the Kitchen
 Serving Size  : 1    Preparation Time :0:00
 Categories    : Beverages

   Amount  Measure       Ingredient -- Preparation Method
 --------  ------------  --------------------------------
    1 1/4  pounds        sour cherries, pitted (about 2 3/4 cups)
    1      cup           sugar
    2      cups          vodka

 Put the cherries into a 1-quart Mason jar, and cover with the sugar. Seal
 the jar and shake it several times, until the cherries are well coated with
 sugar. Add the vodka, reseal and shake the jar a few more times to mix. Set
 aside in a cool, dark place for 4 weeks. Strain the mixture through a fine
 sieve into a 4-cup glass measuring cup. If desired, transfer the liqueur to
 a decanter. The Sour Cherry Vodka should be ready to drink immediately and
 has a shelf life of 2 to 3 months.

 YIELD: 2 cups
I am sure one could substitute agave nectar or even honey to create a combined honey/cherry vodka as well!
I love Christmas. I encourage everyone to look into their family history to build upon deep seated, interesting, and entertaining traditions. I had a great time with my mom, family, friends, and even had a very
impromptu reunion with awesome cousins I hardly ever get a chance to
see. The very best thing about the holidays, no matter what your religion or background, is spending time with those you love.
This one is a little gem. I happen to consider it to be one of the the greatest recipes on the planet but I might be slightly biased. It makes my mouth water just thinking about it, so without further ado, here is Baba's secret recipe for perogies otherwise known as...pyrohy.
This is somewhat a toughie, so if you are new to cooking, I would start with the most important ingredient. Patience. You must also immediately lose your fear of making dough. If you are a seasoned chef you will find this pretty simple, and as long as you have some time to commit to refining your "pinching" skills. You will love the result.
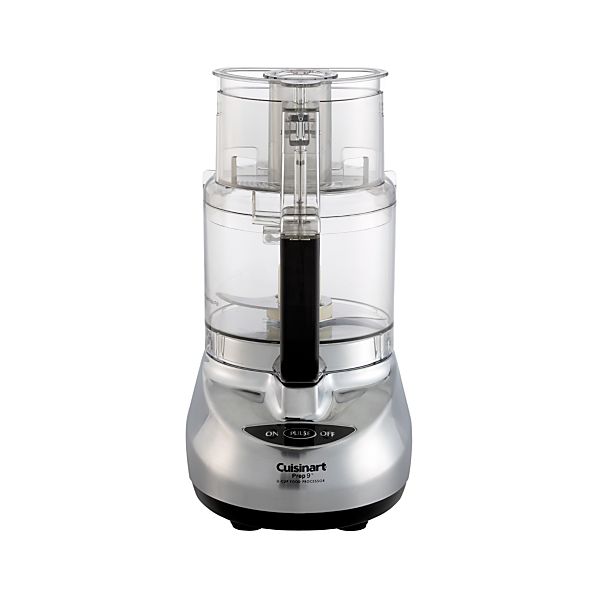
With a food processor such as this one,
the entire experience is shortened and much less grueling. Because making dumplings is a long process I like to split the task into two days. It's convenient to make the filling one day while cooking a whole other meal, and then the next day you put the dumplings together, serve, and save. Depending how big you make them, this recipe should make approximately 50-60 pyrohy. It makes about six solid meals for the cost of...oh... $10.
Day One.
Making the filling.
Ingredients for the filling:
4 Large Potoatoes
1 Large Onion
1 package of farmer's cheese
Pepper
Peel and boil the potatoes, (15-20min-check softness with a fork) and mash. Saute one large onion and add to potatoes. Pepper to taste. Let potatos cool. Add the farmers cheese when cool and mash up everything very well. I have tried using a food processor here and I wouldn't not recommend it. The consistency needs not me tougher so this part takes a bit of elbow grease to make sure everything is nicely mixed with few lumps.
Day Two.
Making the Dough and Assembling. Oh yeah and eating.
Ingredients for Dough:
3 Cups Flour
1 Egg
2 tablespoons Vegetable Oil
3/4 cup COLD water
Put a large pot of water on the stove to boil. That was easy right? Ok now the complicated part...
Add all the ingredients into the food processor but the water. Make sure you are using the dough blade and dough setting. Add water slowly through the feeder until you have a beautiful ball of dough! Have plenty of flour spread out on a baking mat and on your hands because the dough will be sticky. Reach in and split the dough in two. Make sure you cover the processor with a wet cloth to keep the other half moist. Roll the working dough out in one long dough "snake" and then cut the "snake" into 2inch pieces. Roll out each individual piece so you have little flat, round circles of dough. Take a melon baller and scoop individual balls of filling into each circle of dough. Fold the dough over and pinch in a half circle. Set aside and do it again to the next and the next and the next. When you have assembled about 10-15 of them, gently put them in the pot of water that should be at this point at a rolling boil for about 5 min. Remove, cool in a colander, add butter and repeat.
Repeat the entire assembling process with the second half of the dough and filling!
This video kills me. I love the Babas in this clip, and they are not messing around in a factory like setting. The main difference from my instructions and the video is that they roll out all the dough first and then cut circles with a cookie cutter. This is definitely another option, I have just felt like unless you work really quickly the dough dries more this way. They work quickly. ;)
My favorite part of this is when she says "No blowin your nose and then pinchin. We don't like that."
Now I just need to go find myself a "perogie-making" bonnet.
Please write to me with any questions you may have. Good luck and enjoy!!
I really enjoy living in an area where I can support local restaurants most of the time and also satisfy the occasional craving for one of those national chains with a short walk. Do you know who's from Hoboken, New Jersey? Frank Sinatra. Do you know his favorite place to eat there? Melting Pot.
Weeeellll....maybe not but it's mine.
On the Menu:
Spinach Artichoke Cheese Fondue
Fontina and Butterkäse cheeses, spinach, artichoke hearts and garlic California Salad
Mixed-baby-salad greens, Roma tomatoes, walnuts and Gorgonzola cheese with Raspberry Black Walnut Vinaigrette. Steak, chicken and seafood fondues in Mojo-Caribbean-seasoned bouillon with a distinctive fresh-garlic flavor and a citrus flair With these toppings: Curry-A mild, yogurt-based curry that complements fresh vegetables and salmon. Green Goddess-A blend of cream cheese, sour cream, onions, chives and parsley that is great on vegetables and makes an excellent stuffed mushroom. Gorgonzola Port-A rich and robust cheese sauce that pairs well with filet mignon and fresh vegetables. Teriyaki Glaze-A teriyaki glaze with garlic, ginger and onions. Outstanding on our steak items. Ginger Plum-Our own unique recipe with red and green bell peppers, ginger and just a hint of plum that is delicious on chicken and shrimp.
But the cookies cream de la cream was dessert:
Cookies 'n Cream Marshmallow Dream
Dark chocolate topped with marshmallow cream, flambéed, swirled together and garnished with crushed Oreo cookies
Mouth watering yet? I stuffed myself so much don't think I ate for two days after that meal. More like two hours but who's counting...calories??? I'll go to the gym tomorrow. Riiiiight.