Showing posts with label Recipes. Show all posts

Monday, May 27, 2013

Two Memorial Day Summer Treats

C'mon summer you got this. 
Last week it was so cold I took out my down filled coat cursing under my breath. I hate complaining about the weather but this spring has been...lackluster to say the least. What cures the "spring that's really like winter continued" blues?

Kabobs on the grill 
and
Strawberry Avocado Salsa
of course! Duh.


Kabobs. This is fairly self explanatory...I have posted mostly for inspiration and to entice summer to make it's appearance in Jersey.
Marinade meat and seafood for at least two hours before grilling. 
Once fully marinated skewer veggies on sticks (that have been soaking on water), baste with oil and vinegar, salt and pepper to taste and slap them on the grill. Serve with your favorite dipping sauces.

Strawberry Avocado Salsa
This is soooo delicious and sooooo refreshing and sooooo easy to make.

INGREDIENTS
2 cups strawberries, stemmed and diced
1 avocado, peeled, pitted, and diced
1/4 cup red onion, diced
1/4 cup fresh cilantro, chopped
3 Tbsp. lime juice
1 tsp. agave nectar
salt and freshly ground black pepper, to taste

DIRECTIONS
1. Combine all ingredients in a small bowl. Toss gently, season to taste with salt and pepper, and serve.

Serves 4.

(Adapted from Cooking Light)

Happy memorial day!! Hope everyone had a great time grilling their own treats while remembering our nation's military.

Thursday, April 11, 2013

Ultimate Orange Creamsicle

I don't know about you but I have always been in love with the combination of these two flavors:
Orange... and vanilla. 
Stewart's Orange Cream Soda is a guilty pleasure of mine so I set out to find a waaaay healthier version with tons of Vitamin C and Protein! 
Voila!
Ingredients:
Orange Juice
Mango Juice
Vanilla Protein Powder-These are my two favorites:
Arbonne Vanilla Protein Mix
and
Trader Joes Organic Hemp Protein Power
I couldn't find a link to the actual product so the link is to an amazing breakfast bowl instead. You're welcome. ;)
Vanilla Greek Yogurt-I used Chobani
I also added a little bit of non-dairy Vanilla creamer. I absolutely LOVE this one in vanilla.
Easy easy easy!!Yum Yum Yum!!!

Thursday, March 14, 2013

Strawberry Walnut Ghirardelli Chocolate Coconut Cake

 And...It's gluten Free. I know. 
I couldn't fit all of that in the title...I figured Strawberry Walnut Ghirardelli Chocolate Coconut Cake was quite enough.
I wanted to make a cake for my lovely father-in-laws 71st birthday (can't believe it's already been a year since we surprised him in Vancouver) but with my diligence to gluten-free-dom I had to make a slight and easy swap out.  All I did was buy me some Bob's Gluten Free Chocolate cake mix and follow his recipe. (see below) 

I added a cup of Ghirardelli Chocolate chips and a cup of chopped walnuts to the mix. 
Don't you just want to stick your face, I mean, finger in that?
Now we are talkin dirty.
I layered and trimmed with vanilla icing, strawberries and coconut flakes.  YUM.

 Gluten Free Chocolate Cake Mix Instructions

Contributed by: Bob's Red Mill Natural Foods
Gluten Free Chocolate Cake Mix Instructions
  • 16 oz GF Chocolate Cake Mix (2-3/4 cups)
  • 1/2 cup Butter or Margarine, softened
  • 2 tsp Vanilla Extract
  • 1/3 cup Hot (110°F) Water
  • 2 Large Eggs*
  • 1 Tbsp Lemon Juice
  • 1 cup Milk (cow, soy, rice, nut)

Directions

Have all ingredients at room temperature. Preheat oven to 350°F. Generously grease two 8- inch round cake pans. Using large bowl and electric mixer, cream 1/2 cup softened butter or margarine until smooth. Add cake mix, 1 cup milk mixed with 1 tablespoon fresh lemon juice, and two large eggs. Beat 30 seconds on low speed to blend ingredients, scraping down sides of bowl as needed. Next, beat one minute on low-medium speed. Add 1/3 cup hot (110°F) water and two teaspoons vanilla extract. Beat thoroughly for one minute.
Transfer batter to prepared pans. Bake 30-35 minutes or until toothpick inserted into center comes out clean. Remove from oven; cool 10-15 minutes on wire rack. Loosen edges of cake with sharp knife. Place right side up on wire rack to cool completely before cutting. Place your favorite frosting between the two layers, then frost entire cake.
* For an eggless option, combine 2 Tbsp. Bob's Red Mill Flaxseed Meal and 6 Tbsp water in a small bowl. Let stand for 2 minutes and use it in place of the eggs called for in the directions above.
* Vinegar can replace lemon juice if desired.
For Cupcakes: Prepare batter as described above; use paper baking liners in muffin tin; fill 2/3 full. Bake for 15 to 18 minutes. Makes 18 cupcakes.
Gluten Free Chocolate Cake Mix Instructions
Rating
(Not yet rated)

Products Used in this Recipe

Mixes
GF Chocolate Cake Mix

View Details »

Friday, March 8, 2013

Veggie Buddha Bowl with Peanut Sauce


Easiest lunch ever coming from a snowy afternoon in NYC.

So tasty, so simple and a nice change from soup salad and sandwich. Low Calorie, low fat, vegan and gluten free. ALSO, for those of you who are saying to me, Adriana I can't afford to go gluten free I say, go to a local Asian market or grocery store. The noodles and sauce are dirt cheap AND you will be supporting a local family business. Ok? Ok.

Don't really think too hard about these portions. If you want more corn, add more. This is all about throwing a bunch of ingredients together and experimenting with your taste buds.

1 package Asian rice noodles
1 cup chopped broccoli
1 cup corn
1/4 cup onion
1 cup red pepper
Asian peanut sauce-add to taste

Cook noodles according to packaging. Cook and heat veggies according to packaging. Mix it all up and top with the sauce. That's it! I told you this was easy. Enjoy. :)

Monday, February 18, 2013

Homemade Starbucks Oatmeal

 But better, healthier, and gluten free.

Let's see...what to do with all that quinoa...what to do what to do...
Breakfast bowl!!!

Of course I has THIS to look at first in my blog feed to make myself feel inadequate:
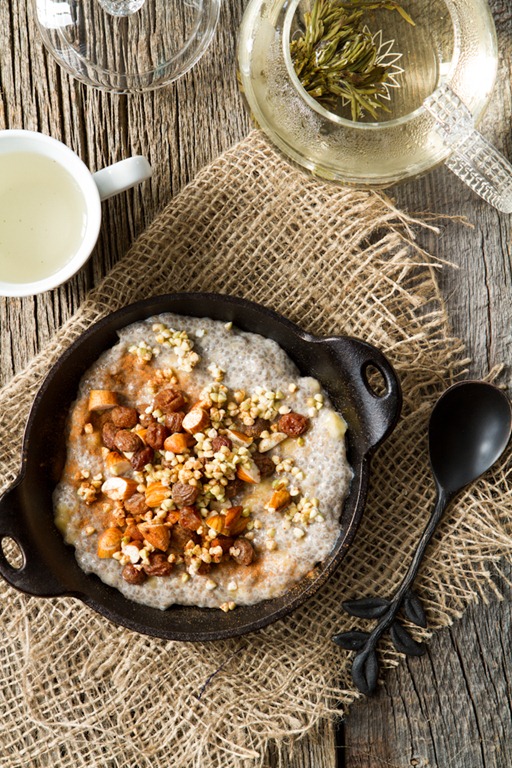
A vegan chia seed breakfast bowl from Oh She Glows.  Looks amazing. Anyhow, it's ok we'll get there... Baby steps right? Just a little lean...

So this isn't even a recipe. It's a "what to do with that stuff in the fridge" combo platter. 
Take the quinoa. Pour a little bit of coconut milk over it. Put it in the microwave for a few minutes. Take it out, top with walnuts, cranberries and even though Jason says it's unecessary, cinnamon and raw cane sugar. I love them both so they are IN!

Don't have any quinoa cooked up? This post tells you what to do just in case.

Voila. The healthier gluten free version of Starbucks oatmeal. Happy Monday morning!


Saturday, January 19, 2013

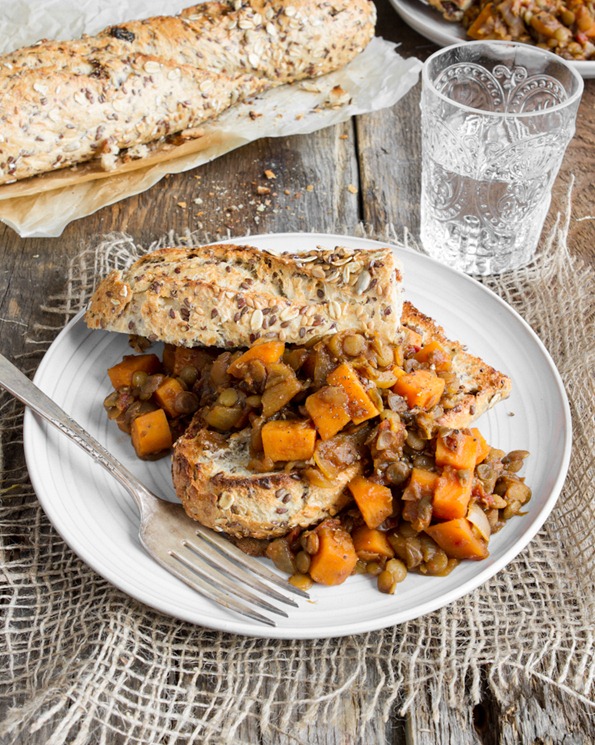
Maple Baked Lentils with Sweet Potato – Healthy Comfort Food

Yes Lentils! Yes Sweet Potatoes! Yes! 
Ugh.This looks amazing. It's happening. 
This is not mine, so I am directing you to the recipe and directions here at:
Wow. That looks just fabulous on this cold January afternoon in NYC...and speaking of January
I love what she writes about dieting and "resolutions" this month:

Oh, January. Your detoxes, cleanses, juice fasts, diet commercials, and cellulite cream jeans are starting to get on my nerves. Just so you know I’m tuning you out, so don’t bother trying to lure me in with 6 easy payments or strict diet plans. It’s just not my thing. My approach to January – or any other month for that matter – is to eat food that makes me feel good and less of what doesn’t.

Love it. So simple. A healthy non-extreme approach to our relationship with food! What a concept!

Friday, January 18, 2013

A Superfood Crepe...and it's Gluten free!!

Superfood. Crepe. Gluten Free. Those words should not go together. Today they do.
Are you so excited??

I am obsessed with crepes. I love those little luscious french pancakes filled with anything from tons of fruit (so healthy) to Nutella (not so much but who cares if you have so much fruit). During our gluten free experiment I had my weekly crepe-crave, so I set out to make a gluten free superfood version. :)

Ingredients
1 cup white rice flour
3/4 cup water
3/4 cup Almond milk
1 egg
1 tablespoon cinnamon
Pinch of salt
3 tablespoons melted butter, plus 3 tablespoons for cooking the crepes

You can fill your crepe with anything you wish...but if you really want to make yourself feel healthy fill with my faves:

1 carton low fat greek yogurt
2 Bananas
2 cups Blueberries

Directions

Batter:
In a mixing bowl, add the flour and salt and make a well in the center. Add the remaining ingredients, except the melted butter, into the center of the well and whisk together until just combined. The mixture should be like VERY loose.  If the mixture is a little thick, whisk in a little more milk. Let the batter sit for at least 30 minutes before using.
*Tip: Crepe batter can be made up to 2 days in advance, covered and refrigerated.

Crepes:
Melt about a 1/2 teaspoon of butter in a small nonstick saute pan. It should coat the bottom of the pan, if there is a lot of excess, wipe it out with a paper towel. Keep the paper towel handy in case you need it again (you will).
Put the pan over medium heat. Fill a 2-ounce ladle, almost to the top, with batter and pour it into the preheated pan, tipping and rolling the pan, as you ladle the batter, to evenly cover the bottom.
When the edges of the crepe begin to pull away from the edges of the pan and the bottom begins to brown a little, turn the crepe over and cook it for about 1 minute on the other side. Remove the crepe from the pan to a plate and let cool. Stack the crepes as they are cooked between parchment paper squares. Repeat this process, until all the batter is used, wiping the pan with your paper towel or melting a little more butter to the pan, as needed.
Fill with your favorite toppings and enjoy!

Tuesday, January 8, 2013

Gluten Free Vegan Mexican Lasagna

Sub title:
It's delicious I swear.
I can't believe this is happening, but I made a quite tasty gluten-free-vegan-Mexican lasagna this week. Wow that's a mouthful. No really it's a mouthful...of deliciousness!! Groan...

I took Rachel Ray's recipe from the Food Network and just did an easy swap out. Remember just do it? Easy swap out. Easy to make and great for parents who need a lot of healthy food in little time. Make double the portion and have leftovers-Jason and I did and it was just as good reheated.

Gluten Free Vegan Mexican Lasagna
Total Time: 30 min

Prep: 10min

Cook: 20 min
Yield: 4 servings
Level: Easy

Ingredients

  • 3 tablespoons extra-virgin olive oil
  • 1 cup quinoa
  • 2 tablespoons chili powder
  • 2 teaspoons ground cumin
  • 1/2 red onion, chopped
  • 1 (15-ounce) can black beans, drained
  • 1 cup medium heat taco sauce or 1 (14-oz) can stewed or fire roasted tomatoes
  • 1 cup frozen corn kernels
  • Salt
  • 8 (8 inch) gluten free tortillas 
  • 2 1/2 cups soy cheese
  • 2 scallions finely chopped

Directions

Preheat the oven to 425 degrees F.

Cook Quinoa according to package. Add taco sauce or fire roasted tomatoes. Add black beans and corn.
Coat a shallow baking dish with remaining extra-virgin olive oil, about 1 tablespoon oil. Cut the tortillas in half or quarters to make them easy to layer with. Build lasagna in layers of quinoa and beans, then tortillas, then cheese. Repeat: quinoa, tortilla, cheese again. Bake lasagna 12 to 15 minutes until cheese is brown and bubbly. Top with the scallions and serve.
 

Saturday, January 5, 2013

Quinoa. The Ultimate Superfood.

Quinoa.
I cannot stress enough the power of this beautiful beautiful grain.  This delightful gluten free filler delivers all of the nutritional benefits of animal protein without the fat and calories. Please please I am begging you to cook this up and have it in your fridge all week!! Your possibilities are endless as you can add it to soups, cold salads, side dishes, pilafs...I have been using it in particular as a meat substitution in all my Mexican dishes and I don't miss the meat one bit.
Directions:

Using two cups of liquid per cup of quinoa. combine liquid and quinoa in a sauce pan or rice cooker. Bring the mixture to a vigorous boil, then lower heat and simmer, covered, until quinoa is tender but still chewy and white spiral-like threads appear around each grain, about 15 minutes. 

You can make a larger batch of quinoa and store it in your refrigerator. During the week as you need it, pull the desired amount of cooked quinoa from your refrigerator and add to your favorite recipes.

I am pretty sure they sell it at most local grocery stores...we get ours at BJs (similar to Costco) and it lasts FOREVER. 
Here is where to get it online:


Tuesday, November 20, 2012

Thanksgiving 2012

So excited. I have finally made my choices for Thanksgiving dinner.  I must give credit where it is due, and these were all recipes from Food Network star chefs, Sunny Anderson, Giada DiLaurentiis and the Barefoot Contessa. Food Network is amazing and their app allows you to bookmark your favorite recipes and cross off ingredients as you go along. Got to love it when grocery shopping gets simplified.
By Sunny Anderson we have 
By Giada DiLaurentiis a side of 
Penne With Butternut Squash and Goat Cheese (I will be making a gluten free version) 
 By Barefoot Contessa, 
French Apple Tart (not gluten free) for dessert.
I will start with longest to shortest prep and cook times.

Ingredients
  • 2 cups apple cider, plus 2 tablespoons
  • 1/4 cup salt, plus more for turkey
  • 3 to 5 sprigs thyme
  • 3 sprigs rosemary plus 1 teaspoon chopped
  • 1 (3 3/4-pound) boneless turkey breast with skin
  • 1/2 cup onion, finely chopped
  • 1 tablespoon olive oil, plus more for turkey
  • Freshly ground black pepper
  • 1 (10-ounce) bag frozen peeled and sliced peaches, chopped
  • 2 tablespoons honey
  • 1 teaspoon Worcestershire sauce
  • 1 tablespoon brown sugar
Directions
In a large bowl, whisk together 2 cups apple cider, salt, thyme and rosemary. Add turkey breast and enough water to cover the bird. Cover and let brine in the refrigerator 2 hours.
Preheat oven to 425 degrees F.
For the glaze:
In a small saucepan, saute onions in oil until softened. Add peaches, honey, Worcestershire sauce, brown sugar and remaining 2 tablespoons apple cider. Bring to a boil. Lower to a simmer and cook until peaches break down and glaze thickens, about 12 minutes.
Remove turkey from brine and pat dry with paper towels. Brush with oil and season with pepper. Place turkey in a roasting pan. Cook 15 minutes until skin begins to turn golden. Reduce the oven temperature to 350 degrees F and brush the top generously with the glaze. Continue cooking until an instant-read thermometer inserted in the thickest part of the breast reaches an internal temperature of 165 degrees F, about 45 minutes. Let the turkey rest at least 10 minutes. Its temperature will continue to rise.


Ingredients
  • Vegetable oil cooking spray
  • 1 (2-pound) butternut or kombucha squash, peeled, seeded and cut into 3/4-inch cubes
  • 1 onion, diced into 1/2-inch pieces
  • Olive oil, for drizzling
  • Kosher salt and freshly ground black pepper
  • 1 pound penne pasta (here I am using a gluten free penne)
  • 1 cup (8 ounces) goat cheese, crumbled
  • 1 cup coarsely chopped walnuts, toasted (see Cook's Note)
  • 1 packed cup chopped fresh basil leaves
  • 1/3 cup finely grated Parmesan
Directions
Put an oven rack in the upper third of the oven. Preheat the oven to 425 degrees F.
Spray a baking sheet, liberally, with vegetable oil cooking spray. Set aside.
Mix the squash and onion together and arrange in a single layer on the prepared baking sheet. Drizzle with olive oil and season with salt and pepper, to taste. Bake for to 40 to 45 minutes until the vegetables are golden and cooked through. Remove from the oven and set aside to cool slightly.
While the squash mixture is cooling, bring a large pot of salted water to a boil over high heat. Add the pasta and cook until tender but still firm to the bite, stirring occasionally, about 8 to 10 minutes. Drain and reserve about 2 cups of the pasta water. Put the pasta, goat cheese and 1 cup of pasta water in a large serving bowl. Toss until the cheese has melted and forms a creamy sauce. Add the squash and onion mixture, the walnuts and the basil. Toss well and season with salt and pepper, to taste. Garnish with Parmesan and serve.
Cook's Note:
To toast the walnuts, arrange them in a single layer on a baking sheet. Bake in a preheated 350 degree F oven until lightly toasted, about 6 to 8 minutes Cool completely before using.


Ingredients
For the pastry:
  • 2 cups all-purpose flour
  • 1/2 teaspoon kosher salt
  • 1 tablespoon sugar
  • 12 tablespoons (11/2 sticks) cold unsalted butter, diced
  • 1/2 cup ice water
For the apples:
  • 4 Granny Smith apples
  • 1/2 cup sugar
  • 4 tablespoons (1/2 stick) cold unsalted butter, small diced
  • 1/2 cup apricot jelly or warm sieved apricot jam
  • 2 tablespoons Calvados, rum, or water
Directions
For the pastry, place the flour, salt, and sugar in the bowl of a food processor fitted with the steel blade. Pulse for a few seconds to combine. Add the butter and pulse 10 to 12 times, until the butter is in small bits the size of peas. With the motor running, pour the ice water down the feed tube and pulse just until the dough starts to come together. Dump onto a floured board and knead quickly into a ball. Wrap in plastic and refrigerate for at least 1 hour.
Preheat the oven to 400 degrees F. Line a sheet pan with parchment paper.
Roll the dough slightly larger than 10 by 14-inches. Using a ruler and a small knife, trim the edges. Place the dough on the prepared sheet pan and refrigerate while you prepare the apples.
Peel the apples and cut them in half through the stem. Remove the stems and cores with a sharp knife and a melon baler. Slice the apples crosswise in 1/4-inch thick slices. Place overlapping slices of apples diagonally down the middle of the tart and continue making diagonal rows on both sides of the first row until the pastry is covered with apple slices. (I tend not to use the apple ends in order to make the arrangement beautiful.) Sprinkle with the full 1/2 cup of sugar and dot with the butter.
Bake for 45 minutes to 1 hour, until the pastry is browned and the edges of the apples start to brown. Rotate the pan once during cooking. If the pastry puffs up in one area, cut a little slit with a knife to let the air out. Don't worry! The apple juices will burn in the pan but the tart will be fine! When the tart's done, heat the apricot jelly together with the Calvados and brush the apples and the pastry completely with the jelly mixture. Loosen the tart with a metal spatula so it doesn't stick to the paper. Allow to cool and serve warm or at room temperature.

Happy Thanksgiving everyone!